Long-term strength and durability
In the second part of his series on the general principles of tooth preparation techniques, Dr Paul A. Tipton BDS, MSc, DGDP UK, looks at a restoration that is both aesthetic and strong
The porcelain-fused to-metal crown is a combination of an aesthetic porcelain veneering material and a metal sub-structure. By covering the metal with porcelain, it is possible to produce a restoration that is not only aesthetic but extremely strong.
The crown preparation for this restoration reflects the materials used in its production and the space required to provide adequate aesthetics and strength for long-term durability.
Space is the key to aesthetics, which in turn means that adequate reduction is required so that the dental technician can produce the stable and aesthetic restoration.
The crown is made up of layers, starting with 0.3mm to 0.4mm of metal; 0.1mm to 0.2mm of opaque porcelain, 0.3mm to 0.4mm of body porcelain and 0.5mm to 0.6mm of translucent porcelain. This gives a reduction in the range of 1.2mm to 1.5mm as advocated by Shillingburg and also Palmeijer in their classic textbooks. Let us consider a central incisor tooth (Figure 1).
The labial preparation should be completed in three places to allow curvature of the preparation and the crown and should be accompanied by the use of depth cuts and/or preparation guides such as a putty matrix (Fig 2), depending on the final positioning of the restoration. Two millimetres are required off the incisal edge to allow for bulk and aesthetics in this essential area (Fig 3).
The ideal finishing line or preparation should be the shoulder with a rounded internal surface or the deep chamfer as opposed to the commonly used square shoulder. This means changing the flat-ended bur and using a round-ended bur of the correct thickness.
If a 1.2mm rounded shoulder is required then a 2.4mm chamfer bur should be used; if a 1.5mm rounded shoulder is required then a 3mm chamfer bur is needed.
The ideal deep chamfer finish line is achieved by cutting with only half the tip of the bur. Otherwise a lip is created which may be difficult for the technician to see, may chip off the model and may cause a poor fit.
The rounded shoulder produces a smoother finish line than the square shoulder, produced by the flat-ended preparation bur (Fig 4).
If there is sound tooth structure interproximally, a vertical wall or wing is left standing in each interproximal area, lingual or palatal to the proximal contact (Fig 5). This preserves tooth structure and adds resistance and retention form to the preparation.
The vertical walls of the preparation should be cut with a six degree bur so that each axial is sufficient for resistance and retention form and also allows visualisation of the “taper”. Studies have shown that the human eye cannot see an axial inclination of less than 5.5 degrees.
Interproximally, where the wings are, the finish line changes from a rounded shoulder to a 0.5mm thinner chamfer. The very change in instrumentation produces the wing required. The 0.5mm chamfer is required in non-aesthetic areas and demarcates to the technician where a metal finish line starts and ends – in non-aesthetic areas.
This allows the creation of aesthetics combined with tooth conservation (Fig 6) Whereby only approximately half the tooth is prepared for a heavy chamfer and half for a light 0.5 (gold crown) prep.
Palatal reduction depends upon whether the crown will have porcelain and metal coverage or only metal and so varies between 0.5mm and 1.0mm, and is produced by a round or rugby ball-shaped bur and reduction assessed by feeler gauges. The positioning of the labial shoulder is dependent upon aesthetics and will be supra, or subgingival depending upon requirements.
For better aesthetics, the restoration is placed subgingivally (0.5mm into the healthy sulcus) and further aesthetic improvements in the crown can be made by a vertical reduction of the metal framework in that area. This permits better light absorption and reflection into the soft tissue areas.
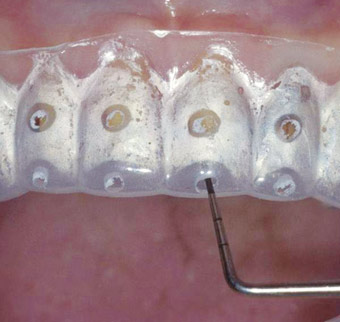
Figures seven to 12 show a clinical case involving conventional porcelain-fused-to-metal crowns.
The next article in this series will describe the changes required for the posterior PFM crown.
About the author
A highly respected specialist in prosthodontics, Paul has published many scientific articles in the dental press and is an expert lecturer in his field with Tipton Training Academies in Manchester, Leeds, London and Dublin.
After gaining his masters degree in conservative dentistry in 1989, he was awarded the diploma in general dental practice by the Royal College of Surgeons four years later and received specialist status in prosthodontics in 1999 from the GDC. An ex-professional cricketer with Lancashire County Cricket Club, he is also the President of the British Academy of Implant Dentistry (http://www.baid.org.uk).
He is one of the UK’s most successful dental teachers in the fields of restorative, cosmetic and implant dentistry over the last 20 years with more than 2,000 dentists completing year-long certificate courses from one of the Tipton Training Academies (http://www.tiptontraining.co.uk). He will be starting his next Dublin Tooth Preparation, Hands-On Phantom Head course in September. For details contact Ralf Sander on (00353) 1 452 4818.
Paul takes referrals for advanced restorative dentistry, implant prosthodontics and cosmetic dentistry from his clinics in London, Leeds and Manchester (tel: + 44 (0) 845 528 0088).
To see the clinical pictures referred to in this article, visit our Facebook page.