Principles of tooth preparation
Dr Paul A. Tipton BDS, MSc, DGDP UK looks at the various tooth preparation techniques that are available to modern GPs keen to improve their techniques in restorative and aesthetic dentistry
This series of articles is dedicated to proper preparation techniques for all types of cast metal and porcelain restorations and for practical restorative techniques including amalgam and composite.
Tooth preparation is often underexplained and not taught well at dental hospital, due to time restraints and lack of clinical expertise – even though the longevity, occlusal stability, strength, aesthetics and periodontal condition depend upon the correct preparation protocol. Thus, newer graduates can often be lacking in these basic skills. This series of articles is for them and for practitioners wishing to revise and review their own techniques in light of recent scientific changes.
Much of this work was first described by Shillingburg in his classic text book Fundamentals of Tooth Preparation (1988) and has been updated by myself using contemporary scientific criteria and literature. The late Lloyd Miller stated: “No other clinical procedure in fixed prosthodontics reveals the care, skill and judgement used by a dentist than the quality of tooth preparation.”
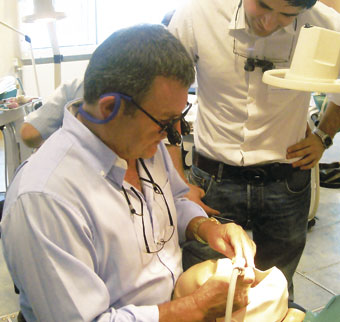
I use all these techniques during the phantom head series of courses to be held in Dublin in 2011 for dentists wanting to improve their techniques in restorative and aesthetic dentistry.
Throughout the series of articles we will explore and teach preparation techniques, not only conventional porcelain fused to metal crowns (Fig 1), but porcelain veneers, inlays/onlays, conventional bridge preps (Figs 2-4) adhesive bridge preps (Fig 5) and also the often forgotten science of the cast gold partial veneer preparation including the three quarter crown and gold onlay (Fig 6) as well as the seven eighths crown and full gold crown, which despite the growth of cosmetic and aesthetic dentistry is still the longest lasting and often least invasive posterior restoration. This type of preparation has now almost been forgotten in dental schools and needs to be refocused on.
The design and preparation of a tooth for a cast metal or porcelain restoration is governed by five principles (Shillingburg 1991):
1. Preservation of tooth structure
2. Retention of resistance form
3. Structural durability
4. Marginal integrity
5. Preservation of the periodontism
For the optimal fitted restoration, preparation must be followed by sealing of the dentine and then by impression techniques using addition cured silicone. Against this backdrop of tooth preparation techniques, other principles need further examination and explanation:
1. Two-handed tooth preparation
2. Use of the speed- increasing handpiece
3. 12 o’clock positioning for anterior restorations
4. Magnification and loupes
5. Fibre-optic handpieces
6. Bur size (Fig 7)
7. Preparation guides (Fig 8)
Two-handed tooth preparation is both easy and totally logical when taught. It gives more precise control over preparation and greater accuracy of cut and can be used in most areas of the mouth. It gives the clinician the ability to ‘lock’ his wrist so that the preparation proceeds more quickly and efficiently without undercuts.
The use of the speed-increasing handpiece is a must for the finesse of the preparation and for margin and retention features. Few dentists appear to have this handpiece and rely on the turbine for their final preparation. The turbine cuts too rapidly for the final stage of tooth preparation where the speed-increasing handpiece is required. Fibre optic handpieces and the use of magnification using dental loupes increases visibility and allows the dentist to cut a more precise preparation.
By working at 12 o’clock directly behind the patient for anterior restorations it ensures that all axial wall preps are perpendicular to the chosen occlusal plane and assists in maintaining ideal contact points/areas between adjacent restorations and the ideal interdental papillae profile, essential for aesthetic restorations, and good lab communication (Figs 9 and 10).
Finally, by knowing and understanding bur size, the dentist can cut with precision and speed. The taper and size of the cutting edge is paramount in understanding preparation techniques. With the use of a preparation guide – often a putty matrix – correct preparation is made easy.
The next article in the series starts with tooth preparation proper by describing the techniques involved in preparing for a porcelain fused to metal crown (PFM)
To view article and images click here
About the Author
About the author
A highly respected specialist in prosthodontics, Paul has published many scientific articles in the dental press and is an expert lecturer in his field with Tipton Training Academies in Manchester, Leeds, London and Dublin. After gaining his Masters Degree in Conservative Dentistry in 1989, he was awarded the Diploma in General Dental Practice by the Royal College of Surgeons four years later and received Specialist status in Prosthodontics in 1999 from the GDC.
An ex-professional cricketer with Lancashire County Cricket Club, he is a past-president of the British Academy of Implant Dentistry (www.baid.org.uk). He is one of the UK’s most successful dental teachers in the fields of restorative, cosmetic and implant dentistry over the last 20 years with more than 2,000 dentists completing a year- long certificate courses from one of the Tipton Training Academies (www.tiptontraining.co.uk).
His new practical restorative course starts in Dublin in March 2011. He takes referrals for advanced restorative dentistry, implant prosthodontics and cosmetic dentistry from his clinics in London, Leeds, Liverpool and Edinburgh
(tel: 0845 528 0088).